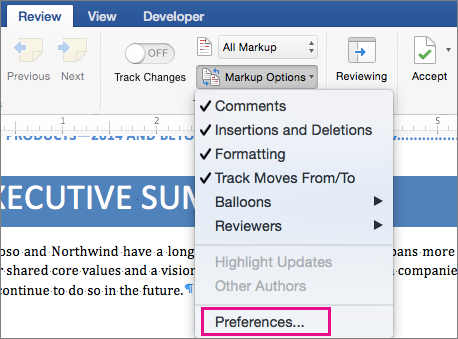
Let’s begin working with file tab in word 2016. Oes2-cluster cifs for mac pro. Working with File tab in word 2016 is really enjoyable and necessary that you can do different things here. File tab is a tab that you can protect your document, you can give password to your document, you can restrict editing the document and you can check for any issues or problem.
Go to View in the menu. Choose Toolbars. Select Customize Toolbars and Menus. Select Toolbars and Menus in the top of the Customize Toolbars and Menus window. Select the item in the list you want to reset (Menu Bar, Standard, Formatting).
Working with File Tab in Word 2016
For the first time when you open the Microsoft word 2016 you will see the screenshot below. At left hand side it shows recent document which you have saved them before. You can click on them in order to edit or anything else. You have the option by the name of “Open Other Documents” you can browse any other document from your computer. Just click on it then a new window will pop up that you can select the file and browse it inside your word program. At the middle or center, there are various kinds of template which everybody can use from them or may search online templates as well, if you are connected to internet otherwise you will not be able to search more template on the internet. So doesn’t matter you may start with blank document, just click on it. In previous version of Microsoft office 2013, 2010 that’s File tab or later version that is not file tab. That’s office button.
Open Word For The First Time
When you tapped on Blank document then new window will pop up. Now click on File tab at upper left-hand corner side of your window.
If you want to protect your documents, just follow the below step by step guide. When you tab to the file tab in word 2016 the first thing that see is info option. This option gives you extra information about the documents which you have written. Like; size, pages, words, total editing time, title, tags and many more info about your document. From using this option you are able to protect the document, restrict editing, check for issue which we discuss through this lesson.
Now we will start from protecting document. Click on it the first thing which you can is “Mark as Final”. Mark as Final let the readers know the document is finalized and make it read-only. For example when your project is completed you can mark it as a final. No-one can edit it for a period of time. If you want to edit, so it has an option to start enable editing. Simply click on Mark as Final then a small new window will pop up, click OK.
Mark as a Final
If you want to encrypt your document with password simply click on protect document then select Encrypt with Password. You will be asked to enter the password, so enter the password for two times. I mean, you have to repeat the password for two times. Now you are done, no one can access to this protected document without having the password. If you want to unprotect it or remove the password just keep the same way which you have done for protecting document. Click on Encryptwith Password then remove the password, press OK.
Warning: If you lose or forget the password, it cannot be recovered. It is advisable to keep a list of passwords and their corresponding document names in safe place.
Next thing that I’m going to show you is, how to restrict editing? Again click on Protect document then select Restrict Editing. Now word program open up with new pane at right hand side. First thing that you can do is, limit formatting to selection of style. Check it and select “Yes, Start Enforcing Protection“.
Second you can allow only a specific task for example, track changes, comments and filling in forms. You can select this rule for everyone. When you click “Yes, Start Enforcing Protection” then you will be asked to enter the password. Just type the password and do confirm the password.
Start Enforcing Protection
Note: If you want to un-restrict, so follow the same way. Go to Info tab, click on Protect document then click on Restrict Editing. Remove the password, hit OK button.
Now I’m going to give you some information about Restrict Access or Add Digital Signature. Restrict Access mostly work in network environment that need RMS (Right Management Servers). RMS should be installed in active directory in windows server. For example you work in a company that have thousand clients so if you want share this document you can restrict access to them or disallow them. Add Digital Signature is the signature or stamp of a company that by external device like trackpad the company sign it then directly it is signed into the word program.
Restrict Access & Add Digital Signature
What is Inspect Document or Check for Issues?
Check for Issue or inspect document is something that make you aware of many things about the document. For example the document was written by someone else, maybe that person had done some mistakes or hidden some texts. From here you can find all those thing by clicking on inspect document.
Inspect Document
First what you are going to do that click on Inspect Document then a new window will pop up. Select all document inspector then press Inspect. It will show all the hidden files, comments, revisions, versions, document properties and personal information, task pane add-ins, embedded documents, macro, forms and many more options that are available, will be shown to you.
After inspecting the document you will see the result whether something is missing, hidden or something like this. As you can see the screenshot below, in this document only one hidden file is found. I have hidden that for test whether is it work or no? Now you can see that it is worked.
Review the Inspector Result
It is the end of this article which I’m going to tell you about accessibility and compatibility in word 2016. Accessibility work mostly in network environment. When a user editing document you can check by this option that which things are edited or something like this. Check Compatibility shows the new things which is added in word 2016 and is this version of word is compatible with earlier versions or no?
This is all about how you can work with file tab in word 2016 first section. Further on we will show the other aspects of file tab in word 2016. I hope that you guys have got something from this article and thanks for being with us.
In this article, you are going to learn that how to use Ribbon Display Options in Microsoft office 2016. Ribbon talks about all options and tabs that you have on the top of your office window. Through to Ribbon Display options, you can manage that how to show and hide them. On your office window, you have eight different tabs which you need to use them to do your job on your documents. But sometimes for showing some documents, or applying some task on your document you need to hide all of them of just the commands. Due to that, you need to know about Displaying and hiding them.
Find the Position to Use Ribbon Display Options
Step 1. Ribbon Display options are the neighbor of Minimize button on the top of your office page or window. by clicking on your page you can easily find it and use it. It contains three options which are:
- Auto-Hide Ribbon
- Show Tabs
- Show Tabs and Commands
Find Ribbon
- Auto-hide Ribbon: – This option let you hide the tabs and commands automatically. When you apply this option to your document quickly your tabs and commands will hide, and you will face with a big and clear window without any tabs. But by click on the tap of your page, the office will show the tabs and commands to use them. And after using the tabs again automatically will hide.
- Show Tabs: – Here it’s the second option which will let you show just the tabs on the top of your office window. And the commands wouldn’t be shown automatically they will be shown by clicking on each tab. Each tab contains their own commands that according to your need you can click on them and use them to your documents. Usually, people are not using this two options because it will take their time to find and click on the commands. But when you used this option, it’s important to know that as I said it will not show the commands automatically and don’t forget that when you clicked to show the commands you need to click again on the tab to hide their command also.
Show the Tabs
How to Show Full Tabs and Commands
- Show Tabs and Commands: – This option has already applied on your office window before knowing about Ribbon Display Options. The benefit of using this option is that to not waste your time and let you. Find and use the commands easily and quickly. But when you want to have a big page without any extra options you can use the other options. Use Ribbon Display Options to know that your document is ready to show anywhere with anyone.
Conclusion
To use ribbon display options you need to know some easy way which I had explained them. The Three options of ribbon let you do your task according to your wishes. Ribbon Display options is a small and important option in Microsoft office 2016. If you have any question or any order about any other article just write down and comment it. Thanks for flowing us.